
how i collage.
so before we begin, i need to get something sorted.
other than elementary school, i have only taken one art class in my adult life. & friends, it was a hot mess. sticky hands i can take, but charcoal everywhere, igggh. why would i divulge such classified information before going into this art tutorial? well, because, education or not, you got this!
collage is such an accessible medium and that is why i love it! that said, i have been playing with paper for over a decade now and i have learned a trick or two along the way! there are a lot of ways to collage, but what you will learn here is what i often refer to as painting with paper, aka scrappin’. let’s get to it shall we?
the materials
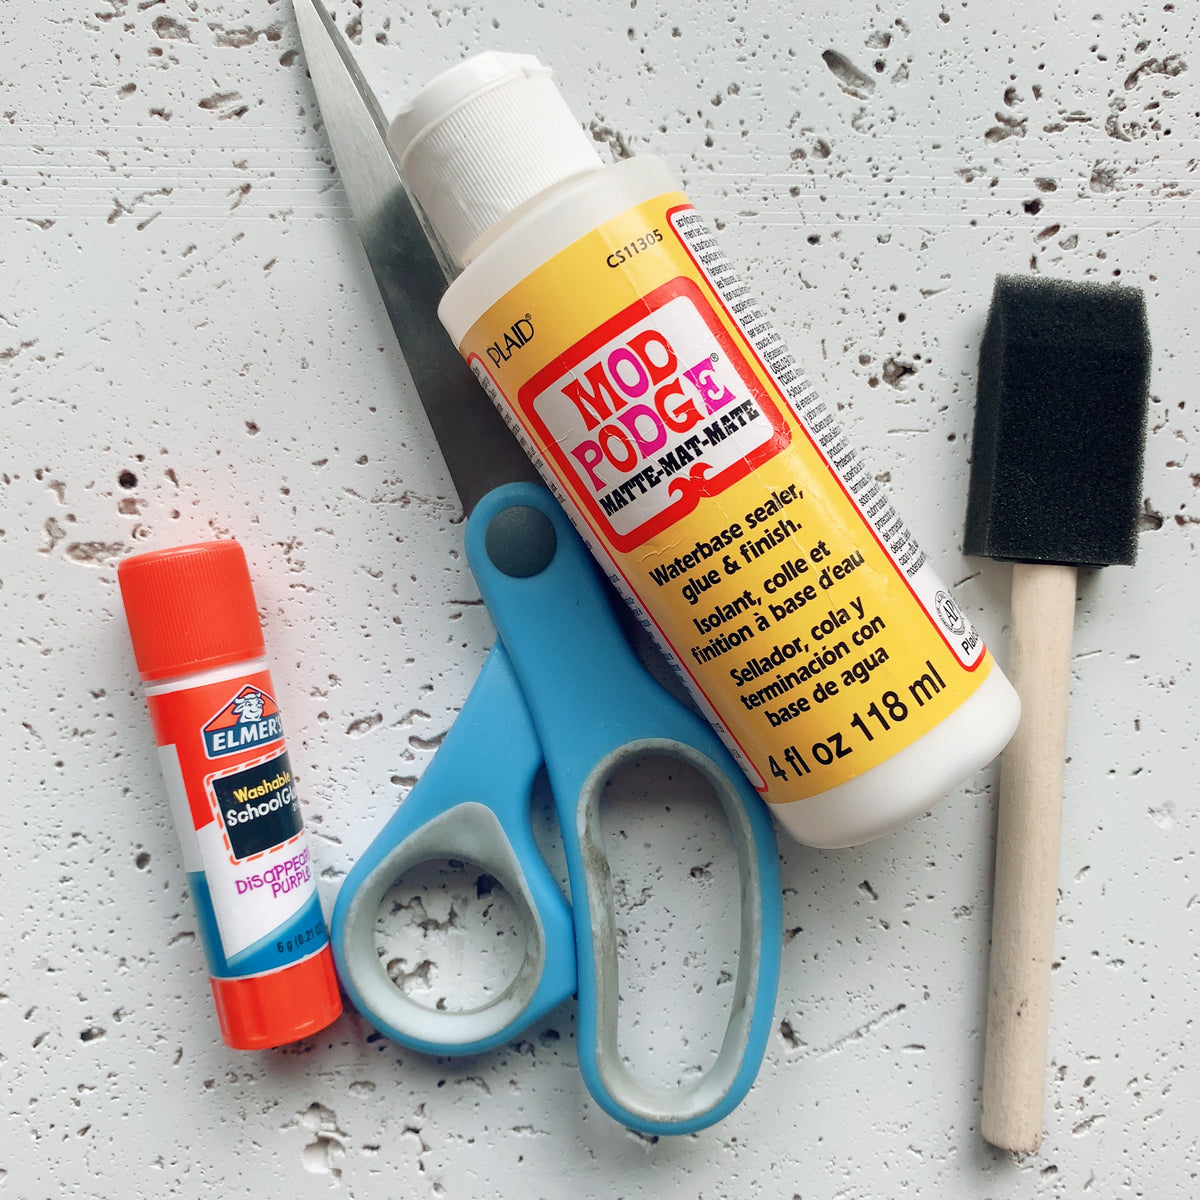
good news! i bet you already have most everything you need somewhere in your home. a ver - scissors (plain ole’ fiscars will do), gluestick (i use elmer’s but whatever you fancy), scrap stock (e.g. old magazines, greeting cards, calendars, maps, junk mail, etc.), something to scrap on (e.g. cardstock, cereal box, frame, artist’s block), white cardstock (optional), mod podge & sponge brush, and giddy excitement (guaranteed).

it starts with an idea...
and if you don’t have one, no problem! start with leisurely thumbing through a magazine or collage, the air bnb & anthopologie catalogs are some of my favs, but i will use anything with a decent paper quality. don’t think too hard as you do this. relax. if you trust the process, you won’t need to find the idea, the idea will make it’s way to you! one second you are flipping through travel leisure and then, bam!, a blue jay sitting on a hickory tree it is!
find your model.
okay, so we have our idea, now let’s give it some form! note, if you are good with a pencil or your idea is abstract, this step is optional. if you are like me and, if left to your own devices, would definitely draw a rhinoceros with five legs, there is a lil’ trick i like to use named google! in the case of this tutorial, the idea that popped into my head was panda bears hugging. daaaaw. but how does that look? well, i simply google ‘panda bears hugging.’ sometimes i find the exact posture i am looking for, or sometimes the photo i find is just enough reference for me to not completely butcher proportions.
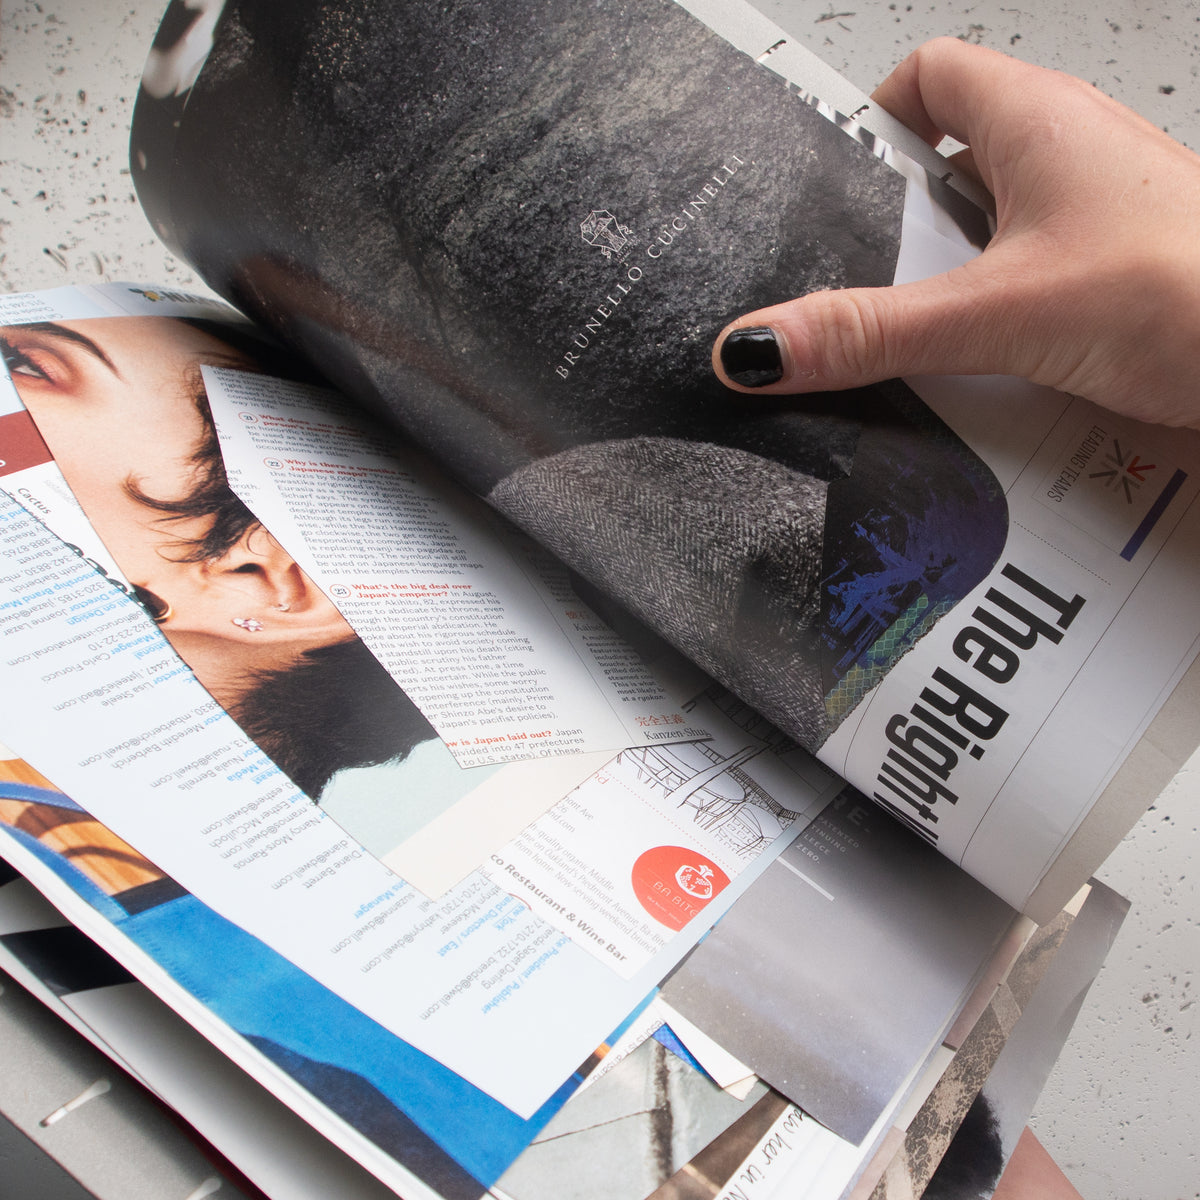
harvest your scraps.
now that we know more or less where we are going, grab those magazines, catalogs or whatever scraps of paper you collected & start harvesting! harvesting? it’s more the merrlier jargon for ripping out the colors & patterns you think could bring your idea to life. don’t worry if the perfect page of green has text all throughout it, see beyond the clutter. if you use my technique you will be painting with paper, not cutting out large pieces, so even two square inches of a cool scrap is worth it.

hot tip - when building your scrap stock, think less about content and more about paper quality & color. in fact, the less interested i am in the content, the better because less distractions! ahem, yes i do need to stop & read what jessica alba loves about being a mom.
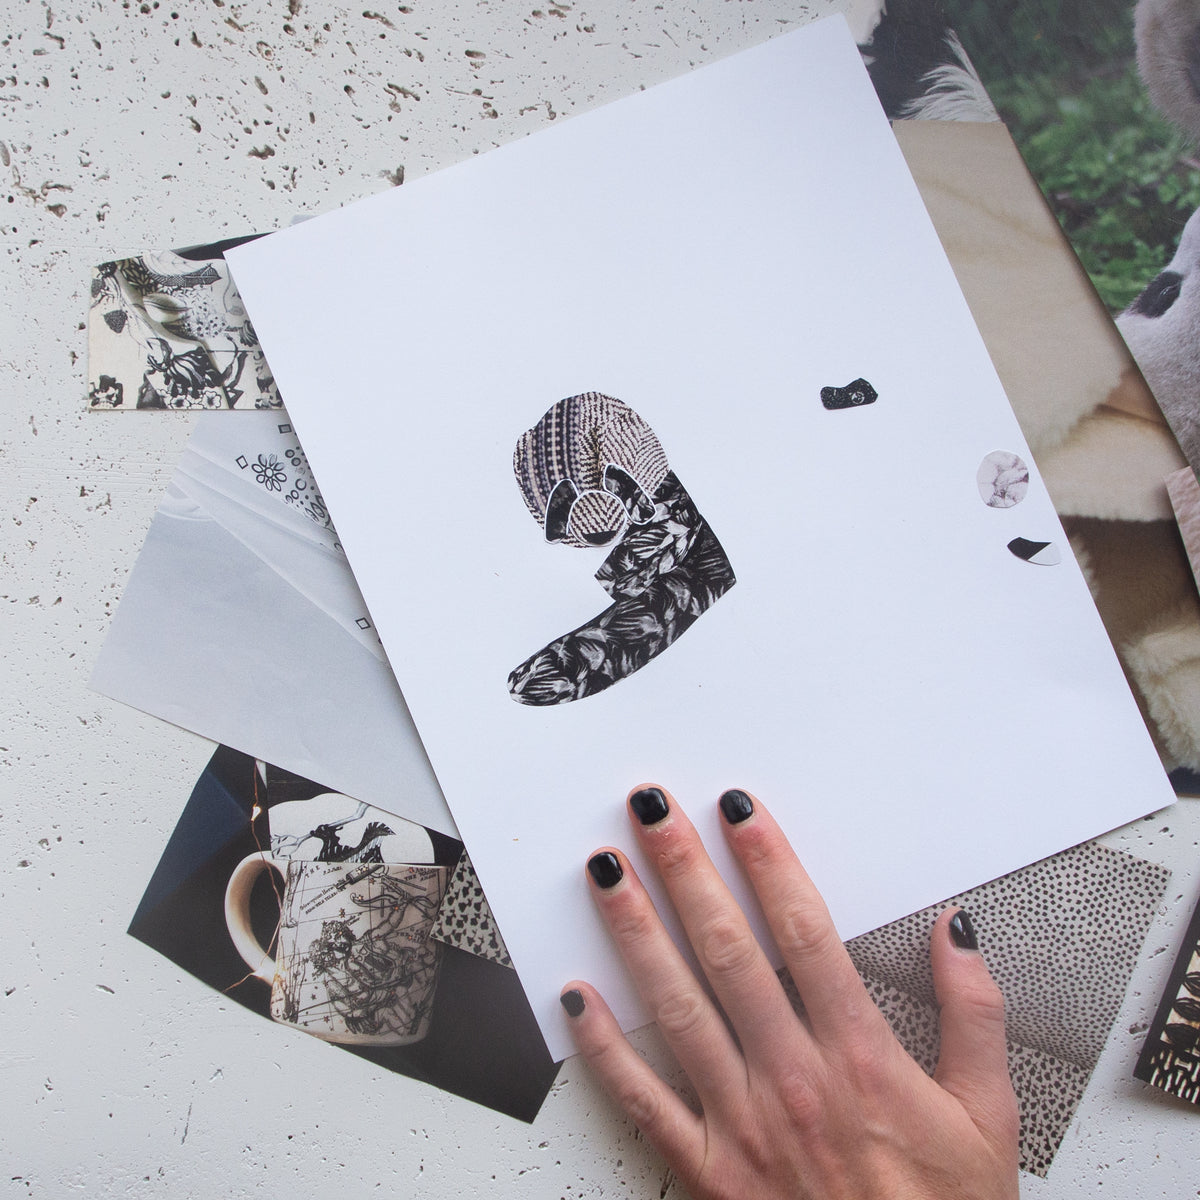
build your base.
once i have my visual guide & selected scrap palette, i get out some white cardstock (nothing fancy, i get mine from michaels), my fiscars & elmers and begin to cut my base shapes. this is likely going to be the hardest part. don’t be afraid to start again if you don’t like what you cut the first time around. the best part about what you are doing is that recycled paper is free, boundless, and full of infinite possibilities. i typically work without glue until i am satisfied with my shapes. when i am ready for elmer, i apply him fully to the back of each scrap at hand. full application is very important when you are working with larger scraps of magazine, otherwise you may get puckering during the mod podge application process.
hot tip - download the michaels app and never buy anything full price again! they have a 50% off one regular priced coupon almost every day!
cut. it. out!
did you say that in the voice of joey gladstone? great! once i am satisfied with my base shape i cut it out leaving a thin margin of white all the way around. this part is totally optional, in a way it’s become my signature style so you should do you! you may find that you want to build your base on hot pink cardstock & leave an inch border. perhaps you want to have no border at all. experiment and have fun.

decorate.
now that you have your base, here comes fun part number two, decorating! if i am making an animal or something that has lots of texture, i will cut a bunch of pieces & then glue them down in batches. when the scraps are really teeny tiny, i like to lightly touch my finger to the top of the gluestick and then tap back and forth to the base i am covering. yes, your finger will get sticky. yes, you will accidentally glue tweed & fuzzies to your base along the way…i would love to say i am more professional than this but it’s the truth. you can just wipe any unintended gunk off with a damp towel when you are done.

find your background pallete.
once you have your focal point(s), you need to find them a home! you have the color palette you originally set aside but you find that in building your focal point (base), an unexpected personality appeared that you will have to otherwise satisfy. i honestly don’t know why or when i started building my focus on white cardstock but the handy part about it is i can easily move it around different background candidates until i find something that sings to me. do these bears want to have a moment under the stars? in a bright bamboo forest? i leave it up to them to tell me. sounds esoteric but i am not trying to be. just lay your focus on top of different colors until it says, walla! hot tip - if you get really into collage, you can do what i do and set up a filling system. think of it like a paint cabinet, but of recycled magazine scraps. each folder can have a certain color, theme, or texture, or both (e.g. solid shades of light blue, light blue texture, beach vibes, metals, etc.).


(cut your mounting piece).
this step is optional. if you want you can collage directly onto a block, frame, box, etc. maybe you want to collage directly onto standard sized cardstock, no cutting needed! the options are endless. the main thing here is to create a boundary that works for you. hot tip - keep in mind that if you are collaging a card to send in the mail, square cards require an extra $0.20 of postage.

make your background.
you can go as crazy as you want on your background but because my focal points are often so detailed, i like to keep it fairly basic. remember that if you are using large pieces of scrap to fully apply glue to the entirety of them. and, if it’s a really large scrap, the mounting piece as well. this will help prevent puckering.

(fun fact)!
if you follow my work, you know i love a triangle. while it does add a certain flavor to the mix, it was born out of necessity. it’s rare when scrappin’ that you will have a huge piece of uninterrupted color or pattern. often you will be working around text or other elements you may not want. hot tip - i suggest saving color palette gathering and fine details (like eyes) for when you have natural light. there is something about scrappin’ with magazines and yellow light that doesn’t mishmash well. or maybe i’m just getting old….

if you plan to print copies of your masterpiece, you will want to scan it before you apply mod podge. i use the tiny lil’ epson perfection v39 scanner ($99.99) and scan at 3600 dots per inch (dpi). quick aside - did you ever cover your hands with glue in elementary school, let it dry, and then delightfully peel it off under the table? okay, cool, was just making sure i wasn’t alone.
mod podge
okay, back to regular programming. if you never used mod podge (podge), get ready to be delighted! first things first, plan to do at least two coats with 24 hrs between them. using a foam brush, apply a medium amount of podge to your design. medium being - don’t pour the entire bottle on your baby, but also don’t be afraid to get a hefty scoop and white it out! it will dry clear before you know it. if i am covering a heavily ‘decorated’ part of my piece i use a dabbing motion, otherwise i use broad strokes.

hot tip - there are fourteen different formulas of podge! glow-in-the-dark, pearl, antique, fabric, glitter, even dishwasher-safe… these guys got you covered! for collaging with recycled magazines on cardstock or wood blocks, i suggest using paper podge in either matte or glossy finish. yes, classic podge can be used, but the ‘paper’ formula is specifically designed to keep paper from yellowing.
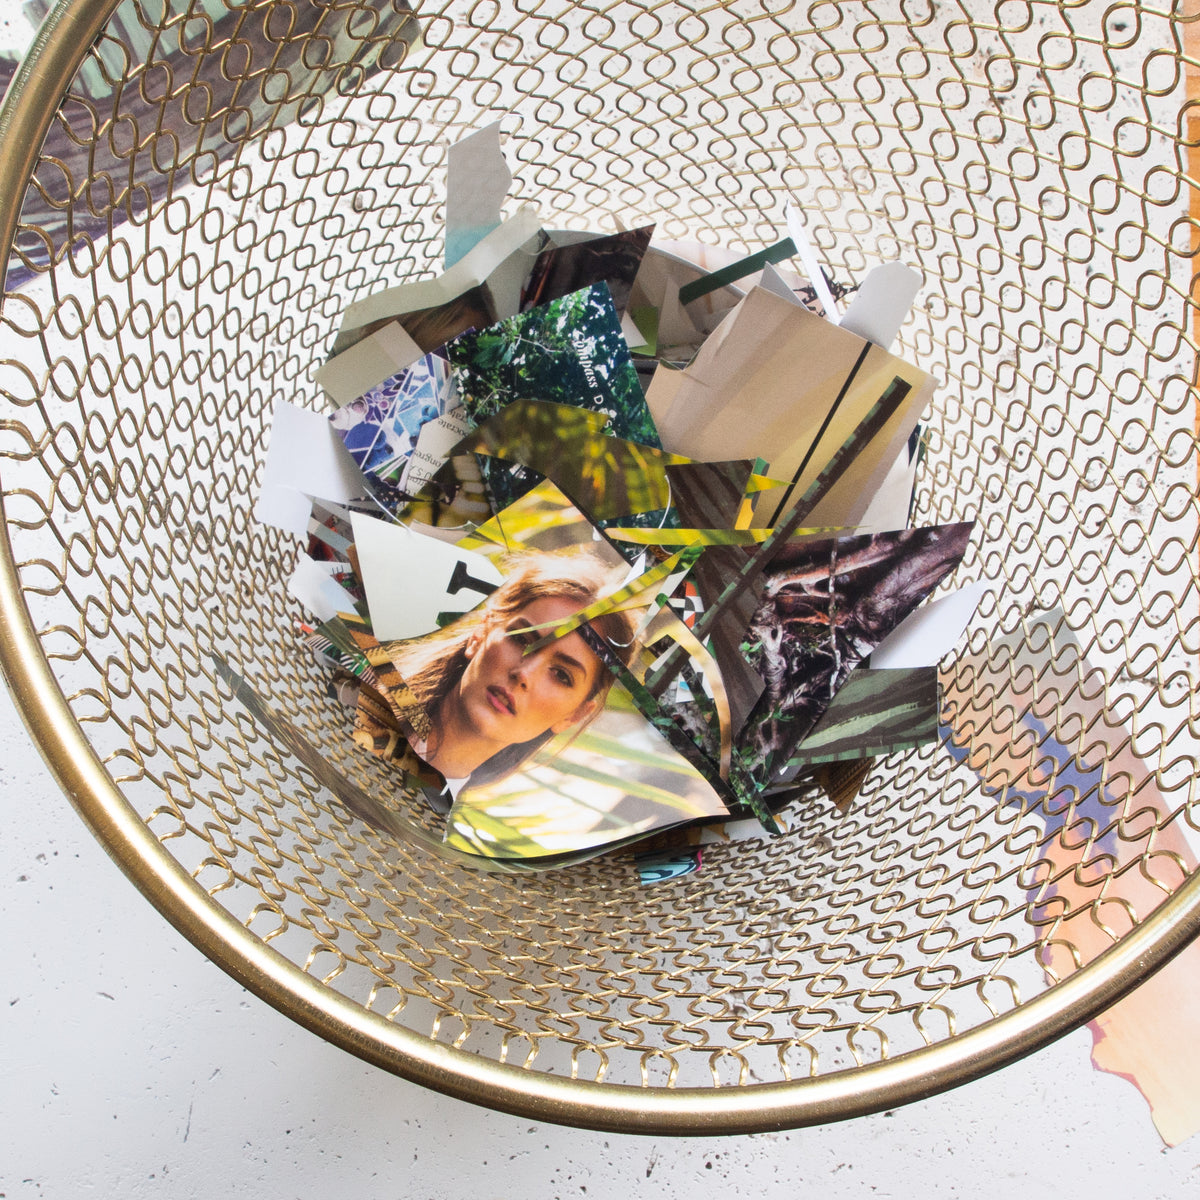
admire your work (& tidy up).
now, this may be overkill as a step, but after i finish a piece i just love swooping all my leftover scraps into my brass bin and clearing space for a new idea! in fact, if i ever feel stuck mid-collage, i will clear all pieces away and pull colors a-new. also, if you have one table in your home like i did for years, this is common courtesy!
subscribe for monday sprinkles
get the behind-the-scenes, down low on designs & exclusive sales!